Initial design process
I had a little corner of my back deck between my sliding bedroom door and a planting area that was isolated by traffic patterns. It was the perfect candidate site for a closet style tool shed. I could gain a good amount of storage and sacrifice nothing in the way of usable deck space. Off to SketchUp to make a plan.
The black wire frame around the design represents the total volume of space I had to work with. I wanted to maximize use of this space but I knew I couldn't design right to these limits because I would crowd my traffic areas.
I didn't bother to model the siding or other exterior details because I could get their dimensions from the constructed shed. I just wanted enough detail to spot any construction pitfalls and to work out how to build the shed style roof pitched to the side.
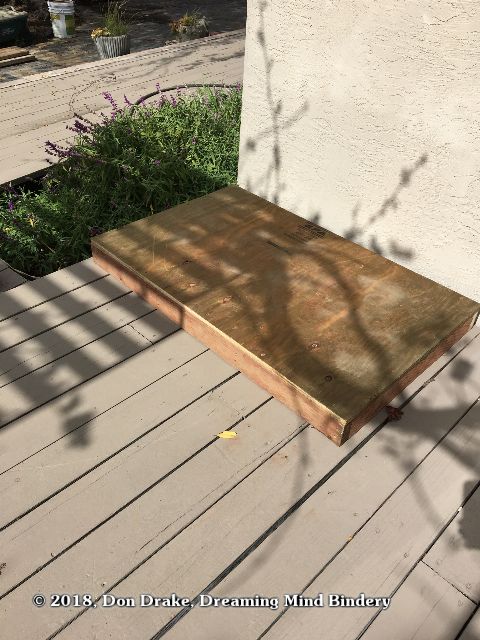
Once I had a design, I built the floor and put it on site to get a estimate how the space would feel with this size shed. I could easily cut the floor down and rebuild if it felt too big, so this would give me a good real-world confirmation of scale.
I also put the shed design into my larger deck plan so I could get a better idea of the overall effect.
You may be able to see the developing problem with the design at this point. It eluded me though. I won't tell you what the problem is until later in the article.
The build

I got to work based on my plan. My new workbench provides such a nice, stable platform, I did all the cutting by hand. Much quieter and there really wasn't that much to do.

The design was modular so after cutting and framing the three walls I temporarily screwed them to the floor and to each other to confirm all my measurements and the basic module construction technique.
The roof was a separate module. Siding would tie all the studs together so simple butt-joints were used there. But for the roof I used half lap joints to gain some frame strength.


The roof rafters were notched to further tie the module components into a nice strong package.

After cutting the siding I moved all the components to the site for assembly. This was the next moment when I might have started suspecting my design miscalculation. But I was really focused on building and was rushing along at this point.

Here are the wall modules after putting the siding on. They've been moved to the final site because this thing is going to be heavy and I din't want to have to move it far after assembly.
Notice how tall the pieces are in relation to the sliding door.


This is after the basic construction was done. And again, notice how it towers over my ladder.
This is when I started to suspect I'd over-scaled it. I tested it in its final location at this point and was surprised by how much it changed visibility of the yard as I went in and out of the bedroom door. But at this point I thought the main problem was the depth of the cabinet.
Gail didn't think things would feel the same once it was painted to match the house. A plausible argument. And I had no intention of taking it apart to rebuild anyway. Especially when I found out it was going to hold my ice chest even if I put its length in front to back!
Finishing up the construction
I got started gluing up the fascia boards and Gail went to work painting the body of the shed, then the trim.

I used biscuit joints to do the long glue-up of the fascia


Gail got some more paint colors on her dedicated painting cloths.
The final design assessment
Because I have some other projects I want to get moving and we're months away from any rain, I'm going to leave the doors un-built for a bit.
But with the shed to this stage I can see that the scale problem isn't primarily in the depth; it's in the height. This first image showing the side doesn't fully reveal the problem. Gail was right about the paint. From this angle the new storage almost reads as a wall of the house.

This more frontal view gives a direct comparison between the shed height and the door height. The scale mismatch starts to intrude on my eye. The slightly wider trim and fascia on the shed relative to the house subtly amplify the effect.

There were steps I could have taken in the initial design process that probably would have revealed this flaw. Fleshing out both my shed drawing and the house details would have revealed the small changes needed to bring things into harmony.
That's a good lesson for me for future landscape elements. My design experience in the bindery has always focused on the object and its parts. Issues of scale were often dictated by external factors like the matted size of images. But when scale was open I typically resolved the question by considering the physical experience of confronting and using the object.
Use (storage capacity) and available space were considered in this closet design, but it turns out there are many other site features and cues that should be taken into account when incorporating a new structure into the landscape.